Showing posts with label home. Show all posts

Friday, March 22, 2013

Birds & blooms and a new hidden laundry room


So right before my state of New Hampshire got clobbered with another snow storm I walked around my yard and saw a bunch of buds coming up through the mulch. I had planted a bunch of different varieties of crocuses and daffodils last fall and I have been patiently waiting to see them. Currently they're now covered with a mound of snow, this is adding to my frustration. It seems like this long winter will never end, but I know spring is right around the corner. 

I don't know what it is about late winter early spring, but for me it always seems to involve a crowbar. This is what we plan on doing while we wait for things to thaw out.

My dream kitchen idea. Not happening just yet, but hopefully in the near future.

These are old pictures of my kitchen taken before we moved in. The space is in the shape of a T, the right side (above) is cabinets and appliances, the left is a breakfast nook and in front is the hideous laundry area that needs to be hidden. I'm still saving up to do make my dream kitchen a reality, but for now I think I'm going to work on the laundry room. What I want to do is get rid of the cabinets and put up shelves, a large countertop over the washer and dryer and build a small extending wall to hide that area and make it separate from the kitchen. I know this will make the kitchen seem smaller, but right now the space isn't working. I don't have places to put things away. The kitchen has become a total mess just like my office once was (when you scroll down you will see what I'm referring to). I like being organized when there is a place for everything to go, but when I hate a room I basically neglect it and don't enjoy keeping it neat and tidy. I have started to rip out the cabinets and have plastered up holes. I will show you those photo's soon and how messy I let this room get, I'm gonna let it all hang out.


Friday, September 14, 2012

Moda Blog Hop - Hometown Visits & Giveaway!


As part of Moda's Blog Hop and Hometown Visits Event, today I'm talking about my home town and my new fabric collection, Mod-Century by Moda: I live in a town called Bedford, New Hampshire. My husband and I moved here four years ago when we found our dream home after years of searching. We had originally focused our search in Massachusetts, but after two years of not finding the right place at the right price, we expanded our search to southern NH and bingo! The house was hidden behind massive bushes that had grown out of control over the years, but the beautiful mid-century architectural elements were unforgettable. A month later we were homeowners! I've been having fun decorating the house since we moved in - and blogging about the process.


We have been here for a while, and I've since learned that comedian Sarah Silverman grew up here, as did SNL alumnus Seth Meyers. Adam Sandler grew up one town over, in Manchester, NH.

Woodbury Cottage Bedford, NH


Also we are lucky to have a great little quilting shop near the Bedford Town Hall called The Quilt Patch, where quilters can buy supplies and take quilting and sewing classes.


Which brings us to the good stuff: As part of the Moda Blog Hop and Hometown Visits Event, I'm giving away a bundle of fabric from my new Mod-Century collection! To enter, just leave a comment with your name under this blog post. That's it! I will announce the winners on September 15th at 11:00AM EST, so you don't have much time... Enter now!


To whet your appetite for these new fabrics, check out this block pattern I received from Moda: View it here.

Monday, August 27, 2012

Wallpaper is finally done!


It was a lot of hard work but the end result was worth it! I got this wallpaper on sale at Urban outfitters for $49 a roll, when compared to Graham & Brown's price of $75, it's a steal.


Do I recommend this paper? Well from this process I now no longer want to wallpaper my bedroom, yet oddly my husband is even more enthusiastic. It was a pain trying to avoid creases when smoothing it out. Once you got a crease it would look horrible and we had to start all over again. Maybe if the paper didn't have a metallic sheen it might not be so noticeable. It did get easier once you got the hand of it and I do have to say I loved the end result. If you do ever buy this paper buy extra just in case and don't use a wallpaper brush, it will leave lines.

Wednesday, August 15, 2012

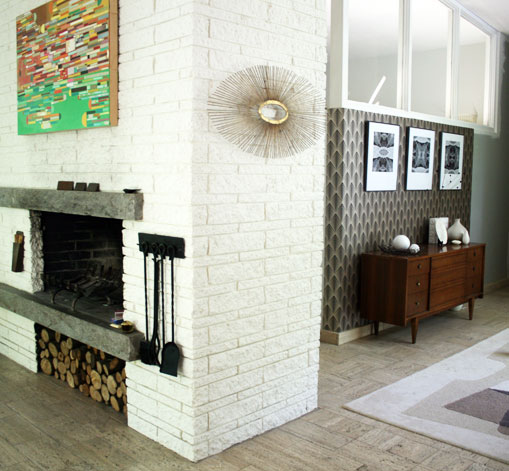
Fireplace update


Got some metal finish samples but I was a bit disappointed because they didn't look like the pictures I saw online. I was hoping the japanese brown patina would have more of a purplish hue, but everything just looks brown to me. I think I might just go black. I'm going to ask for another sample thats just their standard black. Yay, more choices...


Monday, August 6, 2012

Adventures in wallpapering


Wow, putting up this wallpaper was way harder than I imagined. First we ran into the paper not sticking to the wall in certain places. I had initially washed the walls but I guess that wasn't enough, so we went to our local home improvement store and bought a primer for the walls made especially for wallpaper. I could really see a difference the second time around, but then we hit a new problem...


When I tried to smooth out a bubble under the paper with the plastic smoother at the wrong angle the paper would crease, and there was no fixing it at that point. Also for anyone attempting this paper do not use a wallpaper brush, it leaves brush lines, only use a plastic smoother/squeegee. So again we had to rip another piece off the wall.


Also the directions for this paper tell you to paste the paper and let soak for 5 mins. During this process the paper can get stuck to left over tacky paste and some of the black ink would come off, total bummer. I had plans of doing an accent wall in the bedroom with another design, I'm not sure If I want to do that anymore. I have to say I'm getting much better at it. What worries me is that last piece of the wall goes all the way up to the ceiling (11 feet up), I hope I bought enough paper!


Sunday, July 22, 2012

Fireplace insert details

Japanese brown patina


Here is a more detailed image of what it will look like, got my husband Al to take charge of the technical drawing stuff. My sketches always look wonky, thank goodness someone around here can draw things in perspective.


Ok, so I like the japanese brown and the black and I even like the copper. The black to me seems like the safe route and I want this to be a unique looking fireplace. This house has a lot of interesting brass and wrought iron elements so I want this to be special. Guess I'm gonna be the annoying customer and ask for metal samples, I need more than just pictures.


Also still not liking the handle they chose for us, would love to recreate the hardware on the hallway closets. I think the standard handle is ugly for safety reasons. Will look into it.


Hallway closet handles
Front door hardware

Tuesday, January 18, 2011

Architect Ira Rakatansky


Rakatansky studied with Walter Gropius and Marcel Breuer at Harvard in the 1940s. He began building homes and his own home in Providence, Rhode Island. Check out more of his home on Apartment Therapy

Monday, September 6, 2010

Bed Progression


The bed is looking amazing! Still need to pop in the top boards (see plan) and find a new king-size mattress.

Materials: 2 sheets of walnut veneer plywood, several 2x12's from the home center, and walnut veneer edge banding to hide the plywood edges. My husband cut his own shellac and added a reddish brown dye to it to better approximate the look of aged walnut furniture. After three coats of the tinted shellac, he put on two coats of General Finishes Arm-R-Seal wipe-on varnish - one gloss coat and one satin coat.

Total Cost: $490

The next project is going to be a set of matching floating nightstands with spalted maple drawer fronts to add some texture!

Tuesday, July 27, 2010

Illuminated flowers


Ever since I had seen an illuminated arrangement at my Agents house I've always wanted to get a bunch of my own. Not sure where they would go but it's on my list. I found a good selection at www.traditionsfurniture.com

Tuesday, July 13, 2010

Platform bed


We are full of ideas, but actually making it is the scary part. A while back I mentioned a sideboard project we'd designed. Sadly that hasn't come to be. My husband is a bit of a perfectionist and he hasn't yet figured out how to get a nice, even finish without an expensive sprayer... We are new to this furniture-making thing!

OK, so a bed. We really need a bed (and no paint finish problems to worry about!) I showed him some beds I liked and we decided on something simple and strong. We started buying the wood for the inside structure, I'll keep you all updated on our progress.

Monday, July 12, 2010

New and improved


I'm in such a good mood today! The fan is up, the lumen white roller shades are up and I found a cute retro stand yesterday at a flea market for $2.

Everyone who has seen the blinds is shocked at how amazing they look. I'm even thinking about getting another set for my office and master bathroom. I'm sure by the end of the year all my windows treatments will be converted. The fabric I chose for the living room is a bit see through but you can choose from lots of different types, thicknesses, textures and colors.

Click here to see the before photo.

Thursday, July 8, 2010

Can DO!

It's been 100 degrees with high humidity in NH all week! When I went to my local home improvement store to buy some driveway repair gunk, I walked past their awesome celling fan selection and realized I had to have one (we do have an air conditioner in the bedroom, but the rest of the windows in my house are not AC-friendly.)

I was actually quite impressed with some of the fan styles, but I ended up choosing this Harbor Breeze 52" Brushed Nickel Avian Ceiling Fan:Installation was a major pain. Since we have recessed lights in the living room, we had to purchase a recessed light converter kit. Our house being so old, however, the recessed light can was not a standard size, so my husband had to spend the better part of the day - the hot, sticky day - trimming off and adapting the conversion kit to our light cans, and up on the ladder installing the whole thing. The fan finally went up and now sitting at the dinning room table is wonderful!

Blueberries


My property has hills, large boulders, and low swampy areas that dry up in the summer. The low areas are home to really old blue berry bushes that are almost 10 ft tall! This last week the berries have been quickly getting ripe because of the heat wave. Does anyone have any good blueberry recipes?

Tuesday, June 1, 2010

New slat wall and garden pictures


I hope everyone had a good weekend!

I'm feeling wonderful because this past weekend my husband and I finished a slat screen. I wanted to hide the fire wood and other misc junk on the side of the house and this was a beautiful solution. I was inspired by Morgan's slat screen from www.the-brick-house.com. So simple and modern and really quite easy to make. Also I have my new rusty steal planters I had custom made by artist Joe Papendick. It's finally getting there!

Next on the list is to get the driveway sealed and get some new light posts.

Sunday, May 16, 2010

Roller Blinds


I think this may be the answer to my dinning room/ living room privacy needs in the warmer months. I just love that clean glowing look that you get with roller blinds. The picture below is of my living room, I don't really have close neighbors that can peak in but it would to have something there. I'm not sure if I want something sheer so I can see the trees outside or something thicker that won't let people see in at night. Hmmmm....